The Screen Making Process
A great print begins long before ink hits the garment — it begins on the screen. We've invested in a fully in-house screen department, automated coating, and computer-to-screen imaging so every stencil we make is crisp, consistent, and built to hold through the whole run.
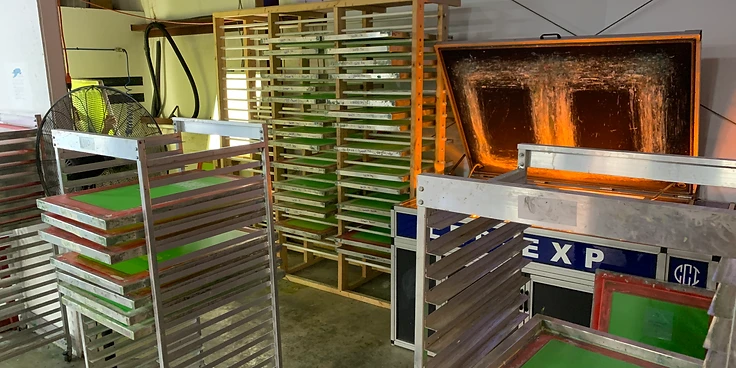
Most shops treat screen making as an afterthought. We treat it as the craft that decides whether a print lands or falls apart. A screen with uneven emulsion, soft detail, or weak stencil life shows up as muddy halftones, broken edges, and screens that fail mid-job.
So we brought the whole process in-house and automated the steps where consistency matters most — coating and imaging — while keeping a human eye on every screen before it earns a place on press.
Mesh Selection & Stretching
Every job starts with the right mesh. We stock a deep inventory of aluminum-framed screens across mesh counts from 110 to 305 — selected by hand for the detail, ink, and substrate of each design. Frames are tensioned and maintained to spec so the mesh stays true run after run.
110–305 MESH · ALUMINUM FRAMEAutomatic Emulsion Coating — M&R Uni-Kote
Coating is where print quality is won or lost. Our M&R Uni-Kote applies direct emulsion with programmable, repeatable pressure and speed — no human variance, no chatter, no thin spots. Dual-edge anodized troughs let us tune emulsion thickness to the exact mesh count, and Job Recall™ stores recipes so every re-order coats identically to the first.
PROGRAMMABLE · DUAL-SIDE · UP TO 100 SCREENS/HRDrying & Curing
Coated screens rest in a controlled, dust-managed drying room until the emulsion reaches full, uniform cure. Humidity and temperature are held steady so the stencil coat hardens consistently — the foundation for crisp edges and clean halftones downstream.
CLIMATE-CONTROLLED · DUST-MANAGEDComputer-to-Screen Imaging — Douthitt CTS
No film. No contact exposure. No registration drift. Our Douthitt CTS images separations directly onto the emulsion using phase-change solid wax ink at 600 DPI — delivering superior image density, razor-sharp detail, and perfect repeatability. Separations register to each other digitally, so press setup is measured in minutes, not hours.
600 DPI · WAX-INK · NO FILM · 23×31 IMAGE AREAExposure
Imaged screens move to our exposure unit for a precise UV cure that locks the stencil. Because the CTS wax blocks light with high density, we can fully harden the emulsion — meaning stencils hold fine detail through long production runs without breaking down.
HIGH-DENSITY STENCIL · LONG-RUN DURABILITYWashout, Pinholing & QC
Each screen is washed out, inspected under light, and pinholed by hand. We block out open mesh, check tension, and verify registration before a screen is cleared for press. A screen only leaves the screen room when it's right.
100% HAND-INSPECTED
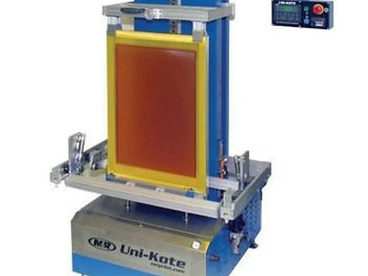
M&R Uni-Kote
A fully programmable automatic screen coater. It applies emulsion with consistent pressure and speed that no hand can match — so coating thickness, and therefore image quality, is identical from screen to screen and order to order. Dual-side coating and Job Recall™ recipes keep re-orders true to the original.
Equipment spec ↗
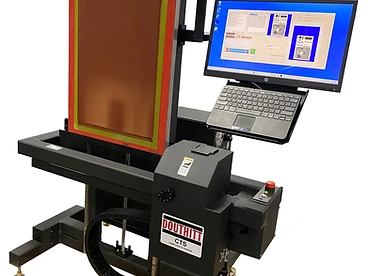
Douthitt CTS
A computer-to-screen imager that prints separations directly onto the emulsion with phase-change solid wax — no film, no contact exposure, no registration drift. The result is superior image density and detail, faster press setup, and a stencil that registers perfectly every time.
Equipment spec ↗Single-Part Photopolymer, LED-Sensitive Emulsion
The stencil is the soul of the print, so we coat with a specialty single-part photopolymer emulsion engineered for LED exposure. Unlike dual-cure diazo emulsions that need mixing and have a short pot life, single-part photopolymer is ready straight from the bucket — no mixing errors, no diazo sensitivity, no shelf-life guesswork.
Tuned to our LED exposure light, it cures fast and deep — locking fine detail, crisp halftones, and sharp edges into a stencil that holds up through long production runs without breaking down. The result is consistent image quality, faster screen turnaround, and a stencil life you can count on.
- Ready-to-use single part — no diazo mixing, no pot-life limits
- LED-tuned cure for fast, full-depth exposure
- Holds fine detail and halftones through long runs
- Consistent stencil life and image quality job to job


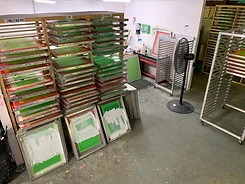

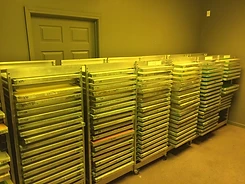
Hundreds of screens, organized by mesh count and job, ready to be reclaimed, recoated, and re-imaged. The scale of the department is what lets us turn jobs fast without ever rushing the screen itself.

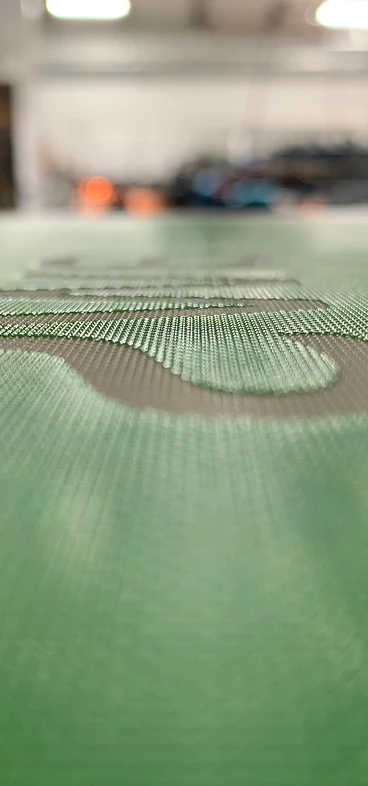
A screen this clean is the difference.
This is what comes out of our screen room — razor-sharp stencil edges, true halftones, and a coat so even the design reads clean from any angle. It's the part of the job customers never see, but it's the reason every print we run looks the way it does.
Most shops buy screens. We make them — and we make them right. That's our secret weapon, and it's in every garment that leaves the floor.
Put our screen room to work.
Start a screen printing quote and get an instant estimate on your job.